ABF: Working with project code and building projects
Contents
Working with Git repositories
Source code of all projects in ABF is stored in Git repositories; a separate repository is created for every project. Git can be accessed wither by HTTPS or by SSH protocols. URL to repository of a project named <project_name>, located in the group named <group_name> looks like<ABF_server_URL>/<group_name>/<project_name>.git. For example, in order to clone Git repository of the 0ad project from the import group using abf.io ABF server by means of HTTPS, you can run the following command on your local machine:
git clone https://abf.rosalinux.ru/import/0ad.git
In order to work with Git repositories on your local machine, you can use any command-line of GUI Git clients or ABF console client. You can also edit files in Git repositories directly in ABF web interface.
In order to explore project Git repository using ABF web interface, you should simply go to the project page. By default, the "Code" section will be displayed with Git repository content corresponding to default project branch. In the upper part of the window you will be able to see the following elements:
- a button with zip label; click on this button to download source code archive (corresponding to the chosen branch or tag) as zip or tar.gz format
- URLs to be used to clone project Git using HTTPS or SSH
- near the URL you can find a button with "question" label; click on it to get detailed help concerning project cloning
- "Current branch/tag" selector whic hcan be used to switch between Git branches and tags.
Below that menu, you can see the following tabs:
- Files - project files in the chosen Git branch or tag. If a file is a text file, you can click on any file and edit it directly in the web interface. In this section you can also see project description, last commit in the current branch and buttons that can be used to start project build, fork it or create a pull request to another project.
- Commits - list of all changes in the current branch of project Git repository
- Branches - existing branches of project Git repository. Here you can compare, delete and create branches. Note that you cannot delete default branch (which is configured in the project settings)
- Tags - existing tags of project Git repository. Here you can view source code corresponding to particular tag or download this code as zip or tar.gz archive.
Storing binary files
In ABF, we do not encourage storing of binary files in Git repositories. This leads to large repository sizes and makes the clone processes slower. At the same time it doesn't make much sense to store binary files in version control system, since you cannot actually track modifications of their content and compare or merge different versions.
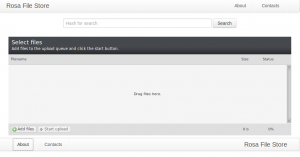
To store binary files, ABF uses File store - a separate file server which can be accessed by means of Web interface, REST API or ABF console client. The file store server allows to upload files and to extract them by their hash sums (computed using SHA1 algorithm).
Binary files should be uploaded to file store, and Git repository should only contain a special .abf.yml file (in YAML format) with list of binary files and their hash sums. Files should be listed in the sources section, for example:
sources:
  "myfile1.tar.gz": e80fd7a3d85e3a75e88780d36c80f672df8ddf64
  "myfile2.gif": a96c913906f6d36c30fa70f8c6ad259dbcfb0a98
When ABF starts a project build, it first analyzes .abf.yml and extracts all files listed there from the file store.
Since .abf.yml itself is stored in Git repository, one can track its modifications. And since the old versions of binary files are not removed from file store, you can always download versions of binary files corresponding to particular branch, tag or even commit.
Note that when ABF console client launches the "put command (i.e., you launch "abf put" inside project Git folder), it automatically uploads all binary files to file store, removes them from Git and adds necessary records to .abf.yml. When a project is created from SRPM package, biary files are automatically uploaded to file store, as well.
Building a project
If you project is a RPM package, then you can build it to repositories of distributions developed in ABF. The build is performed using spec file located at the root of Git repository. If Git doesn't contain any spec files or contain several spec files, then ABF will refuse to build the project.
A package can be built to personal repository of its owner (either group or user) and to repositories to which it was explicitly added. In order to add project to repository, you should go to repository's platform settings (see ABF:: Platform management for details).
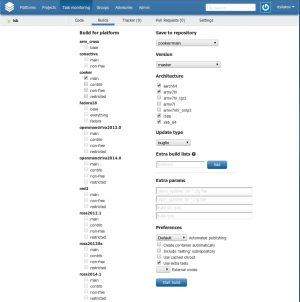
To start project build from its page, go to the "Files" tab and press the "New build" button. On the appeared page you should choose target platform and repository (for which the project will be built), branch or tag of Git repository that will be used for the build and hardware architectures for which the package should be created. When you chooses target repository, then platform, branch and architectures will be chosen automatically on the basis of target platform settings. However, you can change the settings chosen automatically - in particular, you can build a package for for repository using a branch associated with another repository or build a package for a platform that by default uses packages from another group.
Then you should specify update type (it is used by package managers in users' systems - for example, to give users possibility to install only security updates and skip new packages). If needed, you can use additional repositories and results of other builds (not yet published to any repository) - this is useful when repositories used by default do not contain all packages necessary for the build. Note that you can use repositories of personal platforms only if you create a build for another personal platform. To add extra repository, specify its platform name, choose repository from the list appeared and press "Add".
Requirements for the extra build lists:
- one can add only a list with container (see below);
- for non-personal platforms, you can use only build lists for the same platform;
- ABF automatically analyzes hardware architecture of extra build lists and for every build uses only those lists which have the same architecture.
В полях настроек "Дополнительные параметры" можно указать дополнительные опции, которые будут переданы инструментам формирования сборочного окружения и непосредственно сборки.
В секции "Настройки" можно определить:
- будет ли результат сборки сразу опубликован в целевой репозиторий
- будет ли для сборки создан контейнер
- нужно ли подключать для сборки testing-репозиторий (если такие репозитории имеются в целевой платформе)
- можно ли использовать для сборки дополнительные сборочные клиенты, предоставляемые пользователями и не входящими в основную инфраструктуру ABF.
После задания всех настроек, нажмите кнопку "Начать сборку"
Build monitoring
After the build is launched, you will be redirected to the task monitoring page where you will be able to view build tasks corresponding to your project. You can also track status of builds of any projects at the "Task monitoring" page in the ABF main menu. You can use filters in the upper part of monitoring window to track status of projects satisfying certain criteria.
For every build task, the monitoring page displays its id, short build parameters (target platform/repository, project version for already build packages, etc.) and its current status:
- Build pending - the build is not actually started yet, since all build nodes are busy;
- Build started - build process is ongoing; for such processes, ABF display time passed since the build was started and estimated time (calculated on the basis of previous builds of the same package for the same architecture)
- Build is rerun tests - user initiated tests relaunch for the successful build
- Build complete - the build was completed successfully but not published (since the automated publishing is disable by repository settings or user didn't choose this option when creating the build)
- Build is been published - the build was completed successfully and ABF is now publishing built packages to the target repository
- Build has been published - the build was completed successfully and built packages was published to the target repository
- Tests failed - the build was completed successfully, but packages failed to pass tests
- Build failed - build failed
- Publishing failed - the build was completed successfully, but there were errors when publishing built packages to repository.
To save screen space, similar tasks are grouped at the task monitoring page by default. More particular, ABF groups tasks launched for the same project using the same branch or tag but for different repositories or architectures (or just several builds with exactly the same parameters). For such a group of tasks, ABF displays status only one of the tasks (the choice is performed on the basis of statuses). To get details about all tasks, you can click on the arrow icon which is located on the left, near the task id. Additionally, a set of rectangle boxes is displayed near the build id. They number is equal to number of build tasks in the group, and color of every box corresponds to the task status (green for successful builds, red for build or publishing fails).
Build results and containers
As a result of successful build, you will get an SRPM package and one or several RPM packages. You can find links to these packages on the build page, in the "Packages" section. Depending of build and platform configuration, these packages can be either published to the target repository automatically after they are built or ABF can create a separate container for them. Container is a standalone repository which contains only packages from the current build. Container has all necessary metadata files and you can use is in your system as an ordinary repository. The build page will provide you with a path to the container; if container was not created, you can push "Create container" button to create it.
Also note that on the build page you can create a new build with exactly the same parameters by clicking on "Recreate build list". The current build will not be destroyed.
If resulting packages were not published to repository automatically, you can initiate publishing process from the build page. If the build was already published, it can be published once again. This can be useful if target repository contains newer versions of the same packages, but that packages contain errors and it is necessary to revert to previous version. Note that "Publish" and "Publish again" buttons are available only if you have enough privileges to publish packages to the target repository.
In the "Logs" sections, you can find different build logs:
- abfworker::publish-worker-* - a log of publishing of built projects
- abfworker::rpm-worker-* - complete log of project build
- changelog.log - list of changes created on the basis of comments to Git commits; this changelog is automatically attached ton the Changelog section of built packages
- chroot-tree.log - complete list of files in the build environment; this log is available only for unsuccessful builds
- rpm-build.log - separate log of creation of SRPM and RPM packages
- rpm-qa.log - list of packages that were installed in the build environment
- rpm-root.log - log of creation of a chroot for building RPM packages
- rpm-state.log - a log of build state changes during RPM build
- rpmlint.log - a separate log of rpmlint results for the built packages
- src-rpm-build.log - a separate log of SRPM build
- src-rpm-root.log - log of creation of a chroot for building SRPM package
- src-rpm-state.log - a log of build state changes during SRPM build
- tests.log - log of tests launched for the built packages
Depending on build results and platform settings, some of these logs may be absent.
Pull requests
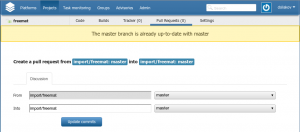
Если у вас есть две версии одного проекта (например, два различных проекта, один из которых был изначально получен клонированием другого, либо две ветки одного проекта) и вы хотите перенести изменения из одной версии в другую, то вы можете воспользоваться механизмом запросов на изменение. Для этого перейдите на страницу проекта, изменения из которого вы ходтите перенести в другой проект (или другую ветку того же самого проекта) и нажмите кнопку "Пул реквест". Обратите внимание, что эта кнопка доступна только в случае, когда вы имеете права на запись в текущий проект.
В появившемся окне выберете исходную ветку текущего проекта и целевой проект и его ветку, в которую необходимо перенести изменения. После этого нажмите кнопку "Обновить коммиты".
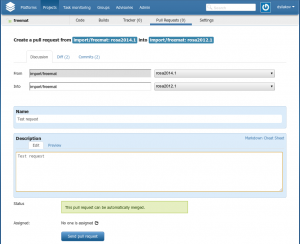
ABF проанализирует код в исходной и целевой ветке и отобразит диалог для ввода названия и детального описания запроса на изменения. Также появятся вкладки "Изменения" и "Коммиты", на которых можно детально ознакомиться с изменениями, которые будут перенесены. Также ABF проаналзирует, могут ли изменения быть перенесены автоматичсеки - то есть завершится ли успехом команда "git merge" по вливанию изменений в целевую ветку.
Для завершения создания пул реквеста, нажмите кнопку "Создать пул реквест".
После этого на странице целевого проекта во вкладке "Пул реквесты" появится запись о поступившем запросе на изменения.
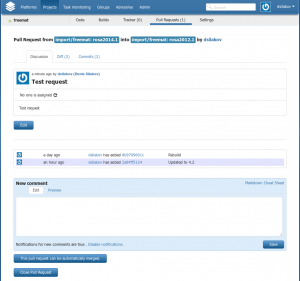
Человек, обладающий парвами записи в проект, может просмотреть каждый запрос, кликнув на его имени. На этой же странице можно оставлять комментарии к запросам и обсуждать их.
Если изменения могут быть внесены в проект автоматически, то появится кнопка "Данный пул реквест можно смержить автоматически", при нажатии на которую ABF сам внесет все запрошенные изменения и закроет запрос.
Если же предлагаемые изменения конфликтуют с кодовой базой проекта, то этой кнопки не появится, а в заголовке запроса будет отображен статус "Заблокирован". Такие ситуации необходимо разрешать вручную - в общем случае, необходимо вручную попробовать слить две версии кода посредством "git merge" и разрешить спорные ситуации.
Для закрытия запроса, нажмите кнопку "Close pull request".

