Automated Testing
The automated testing system for the applications running under ROSA Linux allows to check different usage scenarios of these applications by emulating user actions:
- keyboard input
- mouse movement and button clicks
The source code: https://abf.rosalinux.ru/spectre/rosa-autotest/
The system is build upon Python unit testing framework, Python 2.7 is needed. Besides that, the system includes a modified version of Xpresser tool.
Contents
Testing GUI Applications
The tests for GUI applications may run in two different modes in our system:
- A test runs locally, that is, on the same machine where the application under test is running. This mode is more suitable during the development and debugging of the tests. It can also be used for testing the applications on the real hardware.
- A test operates on the applications that run on a different (usually, virtual) machine. This is convenient for automated runs of the testing system to check the new builds of the distro. Besides, it is possible to check the boot and installation of the OS in this mode, as well as other things that are difficult to check if the tests run locally.
The tests for the applications in the installed OS should usually be written so that they could run in both modes. If the test uses only Python unittest API and the API provided by our system, this will be achieved automatically.
Testing Applications Running on a Separate Machine
Note. For most developers, it will likely be more convenient to run the tests locally instead (see below).
Setup instructions for the software needed for this mode are available here: https://abf.rosalinux.ru/spectre/rosa-autotest/tree/master/doc
The following script runs the whole test suite: launcher.py
Testing Applications Locally
Here it is assumed that everything is performed on ROSA Desktop Fresh.
- First, install the prerequisites:
# urpmi python-distribute python-xlib opencv-devel python-opencv python-numpy python-imaging
# urpmi git scrot
# easy_install pyuserinput
- Some image editor will also be needed to prepare the images for the tests (usually, parts of the screenshots). For example, GIMP can be used.
- The newest version of the testing system is available in the git repository:
$ git clone https://abf.rosalinux.ru/spectre/rosa-autotest.git
Here we assume the source code of the testing system is now in /home/user/rosa-autotest.
For Python to find the needed modules when the tests are executed, one may prepare symlinks to their directories in /usr/lib/python2.7/site-packages/ (as root):
# ln -s /home/user/rosa-autotest/rosa_autotest /usr/lib/python2.7/site-packages/
# ln -s /home/user/rosa-autotest/rosatest /usr/lib/python2.7/site-packages/
# ln -s /home/user/rosa-autotest/xpresser /usr/lib/python2.7/site-packages/
The path to the modules could be specified in PYTHONPATH environment variable instead.
To check that all the necessary paths are set correctly, one may launch Python and try to import the modules, for example:
$ python -c "import rosa_autotest, rosatest, xpresser"
If this command completes successfully, the paths are OK.
Creating the Tests - Tutorial #1
Here we assume the test developer has at least basic skills in Python (to obtain these skills, it would be more than enough to study the official tutorial: http://docs.python.org/2.7/tutorial/index.html)
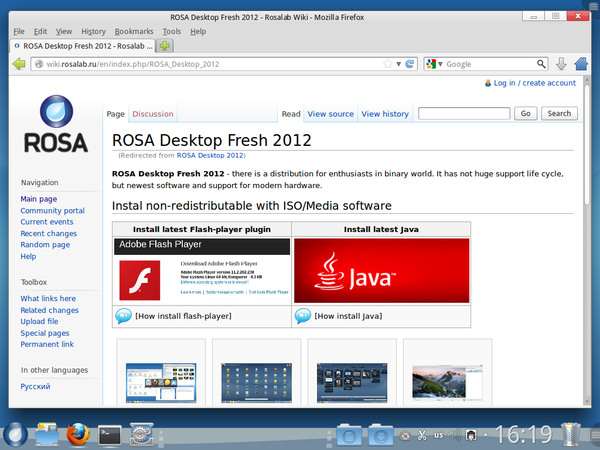
Let us prepare a test that launches Firefox, opens a new tab and goes to a particular web site. Everything is done here on ROSA Desktop Fresh with KDE.
First, create a file, say, test_firefox.py and images subdirectory in the same directory. images will contain the images the test will use.
Suppose the desktop looks as follows before the test starts:
To launch Firefox, it is enough to click its icon on the panel. For the test to be able to do so automatically, let us take a screenshot and extract the icon from there: ![]() . It is often desirable to take only the inner part of that image (
. It is often desirable to take only the inner part of that image (![]() ), to avoid depending on the background of the icon.
), to avoid depending on the background of the icon.
Save that image as ff-start.png in images subdirectory.
Now open test_firefox.py in a text editor of your choice and write the following there:
import time
import rosatest

class TestFirefox(rosatest.TestCaseInstalled):
    """Tests for Firefox"""

    @rosatest.imagebased
    def test_ff(self):
        """A simple test"""
        self.load_images("images")

        self.click("ff-start")
The needed modules are imported at the beginning, then TestFirefox is defined as a class derived from rosatest.TestCaseInstalled.
The derived classes of rosatest.TestCaseInstalled are used to test software on the installed system, the ones derived from rosatest.TestCaseLive - on the system booted in Live mode.
As usual in the development of the tests based on Python unittest, we should define one or more functions (test methods) in the class, each performing a test as a part of the test case. In this tutorial, it is test_ff().
The test functions that rely on image recognition and emulation of the user actions should be marked with @rosatest.imagebased decorator.
self.load_images("images") loads the images to be used by the test from the specified directory (images that has been created earlier).
self.click("ff-start") looks for the image images/ff-start.png on the screen and clicks the left mouse button at the center of the found image. If it does not find the image, an exception will be raised and the test will fail.
Now we can execute the test and check that it actually launches Firefox (assuming Firefox is not running yet). The easiest way is perhaps to use local.py script. The results of the test will be placed to results subdirectory of the current directory in this case.
python /home/user/rosa-autotest/rosatest/local.py <path to test_firefox.py>
Firefox should start as a result:
The following will be printed to the console:
== Starting test test_firefox.TestFirefox.test_ff ==

Ran 1 test
OK
Note. Each test has an ID in the form file_name.class_name.function_name. When executed with local.py, the test will save its results to results/file_name/class_name/function_name/ subdirectory of the current directory. Subdirectory tmp/file_name/class_name/function_name/ is used to store the temporary files during the execution of the test.
At the moment, the test only launches Firefox but does not check the browser has started successfully. We can try, for example, to check that "Home" button (![]() ) has appeared.
) has appeared.
Take a shot of the appropriate part of the screen and save the image of that button as images/ff-home-button.png. Then add the following to test_ff():
self.wait("ff-home-button")
wait() waits till the given image appears on the screen. If the image does show up, the execution of the test continues. If the given amount of time (30 seconds by default) has passed but the image has not appeared, wait() raises an exception, the test ends and is marked as failed.
The maximum amount of time to wait for an image can be set in timeout argument, the interval between consecutive checks - in interval, for example:
self.wait("ff-home-button", timeout=120, interval=5)
timeout is 0, wait() will not wait at all but will rather check immediately if the image is present.
If the image has not appeared so far, the test will end with an error:
== Starting test test_firefox.TestFirefox.test_ff ==

==============================
FAIL: test_ff (test_firefox.TestFirefox)
A simple test
------------------------------
Traceback (most recent call last):
  File "/usr/lib/python2.7/site-packages/rosatest/test.py", line 349, in internal
    func(self, *args, **kwargs)
  File "/home/eugene/work/tutorial/test_firefox.py", line 13, in test_ff
    self.wait("ff-home-button", timeout=1)
  File "/usr/lib/python2.7/site-packages/rosatest/test.py", line 299, in wait
    match, "Failed to find an image on the screen: " + image)
AssertionError: Failed to find an image on the screen: ff-home-button

Ran 1 test
FAILED (failures=1)
When a test ends with an error, a screenshot will be taken at the time of failure and saved to the results directory of the test as 'scr_failure.png'. This may help analyze what has gone wrong. The log of the test (test.log in the results directory) may also contain information useful when analyzing the results, including the messages output by that test.
Note. The system uses the standard assertion methods from Python unittest. TestCase classes from rosatest module are derived from unittest.TestCase, so the tests may use the facilities from unittest directly.
Now let the test open a new tab by clicking at ![]() (save this image as images/ff-new-tab.png), and enter "www.rosalab.com" there. To achieve this, add the following to
(save this image as images/ff-new-tab.png), and enter "www.rosalab.com" there. To achieve this, add the following to test_ff():
        self.click("ff-new-tab")

        # Wait a little for the tab to open.
        time.sleep(1)

        self.type_string("www.rosalab.com")
What remains is to press "Enter" and wait until Firefox opens the needed site:
Code:
        self.press_key("enter")
        self.wait("rosa-logo")
"www.rosalab.com" should open as a result:
The test may close Firefox now. To do this, let it press "alt-f4":
self.press_key("alt-f4")
Note. press_key() can be used to emulate pressing of both single keys ("esc", "f4", etc.) and the combinations of keys. The combinations are written with a hyphen as a separator: "ctrl-alt-v", "shift-f7", "ctrl-a" and so on. The names of the keys used by the testing system are listed here: http://en.wikibooks.org/wiki/QEMU/Monitor#sendkey_keys. In addition to that list, there are some handy aliases: "ret" and "enter" can be used for the "Enter" key, "del" is an alias for "delete", "ins" - for "insert".
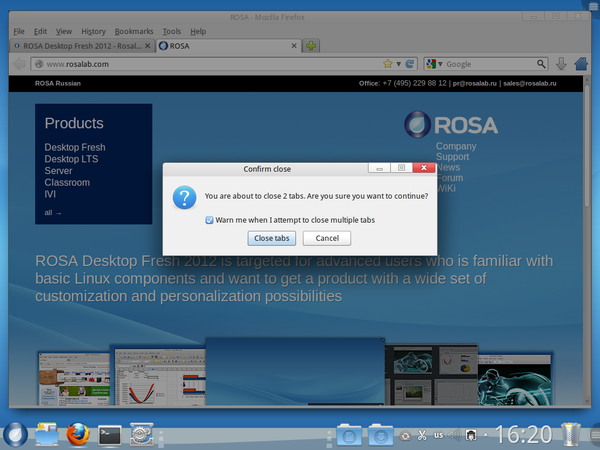
One should take into account that Firefox may (or may not) issue a warning about closing multiple tabs:
The test may check, for example, whether "Close tabs" button (![]() , images/ff-close-tabs.png) appears on the screen and if it does, click it:
, images/ff-close-tabs.png) appears on the screen and if it does, click it:
        button = self.find("ff-close-tabs", timeout=5)
        if button:
            self.click(button)
find() is similar to wait() with a single significant difference. If the image is not found on the screen, find() returns None but does not raise exceptions. The test is not considered failed.
If the image is found, both find() and wait() return an object that can be passed to click(), right_click(), double_click() and the like instead of the name of an image which is demonstrated above.
So, here is the complete test:
import time
import rosatest

class TestFirefox(rosatest.TestCaseInstalled):
    """Tests for Firefox"""

    @rosatest.imagebased
    def test_ff(self):
        """A simple test"""
        self.load_images("images")

        self.click("ff-start")
        self.wait("ff-home-button")

        self.click("ff-new-tab")

        # Wait a little for the tab to open.
        time.sleep(1)

        self.type_string("www.rosalab.com")
        self.press_key("enter")
        self.wait("rosa-logo")

        self.press_key("alt-f4")

        button = self.find("ff-close-tabs", timeout=5)
        if button:
            self.click(button)
Creating the Tests - Tutorial #2
The previous tutorial showed the structure of a simple test and a handful of basic operations the tests can perform. The next tutorial demonstrates more operations including the facilities to work with the files in the tests.
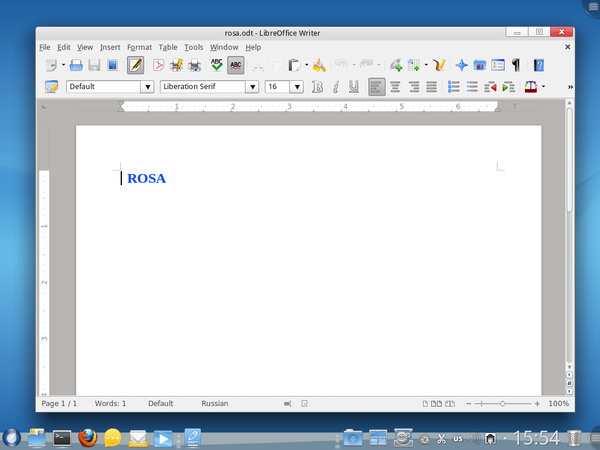
In this case, the test will launch LibreOffice Writer, open a file there that has been prepared earlier (rosa.odt) and check that Writer actually shows the contents of the file.
Create test_files.py file and two subdirectories, images and files in the same directory. Same as in the previous tutorial, images will contain the images used by the test. Place rosa.odt in files/.
As usual, import the needed modules at the beginning of test_files.py, then define a test case class and its methods that will perform this particular test. In this case, only one test method is defined but it is possible to define several of them. A common practice for test development with Python unittest, the names of the test methods should start with "test_". In this case, the testing system will be able to recognize these methods (see the description of unittest module for details).
A test case class may have other methods as well. For example, everything needed to open a file in LibreOffice Writer will be placed in a separate method open_file() in this tutorial.
import time
import os.path
import rosatest

class TestFiles(rosatest.TestCaseInstalled):

    @rosatest.imagebased
    def test_files(self):
        """A test to show file operations"""
        self.load_images("images")
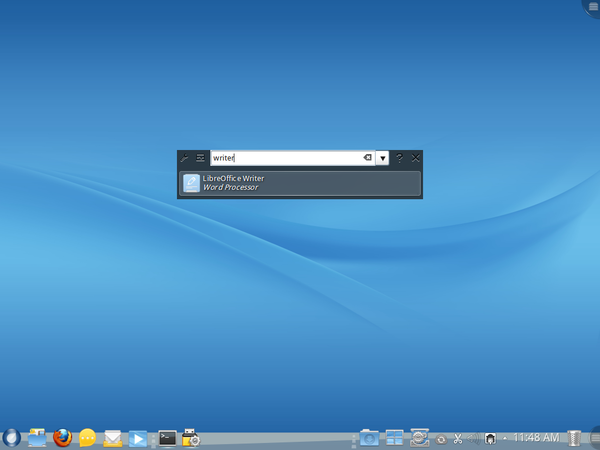
To launch Writer, one may click its icon in SimpleWelcome, or, alternatively, press "alt-f2" and enter the name of the application in the "Run application" window. Let us implement the latter variant:
        self.press_key("alt-f2")
        time.sleep(1) # wait a little for the edit control to show up

        # Start LibreOffice Writer
        self.type_string("writer\n")
Note. It is also possible to press "Enter" in a separate command instead (self.press_key("enter")). It is often more convenient to simply add "\n" at the end of the entered string though.
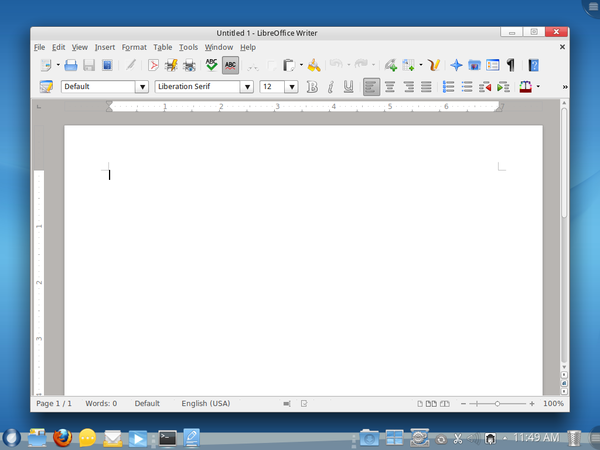
Let us check that Writer has actually started. that is, that the following has appeared on the screen no later than in a minute:
We could try to look for the caption of the Writer's main window on the screen (![]() ). Still, it turns out that the testing system does not always recognize such images with small letters on a grayish background. To make it more reliable, let us look for the images of the buttons used to make the text bold, italic, etc.:
). Still, it turns out that the testing system does not always recognize such images with small letters on a grayish background. To make it more reliable, let us look for the images of the buttons used to make the text bold, italic, etc.: ![]() (images/writer-panel.png).
(images/writer-panel.png).
self.wait("writer-panel", timeout=60, interval=5)
Note. If the previous session with Writer did not end correctly, a window suggesting to recover the previously open files may pop up first when Writer starts. For simplicity, such situations are not handled in this tutorial, this is left as an exercise for the reader.
Sometimes the main window of Writer does not get input focus after the application starts. Let us click that window, just in case, to make sure the focus is there. To be exact, the center of the screen will be clicked, for simplicity:
        width, height = self.screen_size()

        # Make sure the main window has focus
        self.click(width/2, height/2)
Recall that the tests may operate not only locally but also on the applications running in a different machine. To work with rosa.odt on the system under test, one must upload it there with put_file():
        # Use put_file() to copy the file to the system under test
        path = self.put_file("files/rosa.odt", "rosa.odt")
When the test is executed locally (like it is in this tutorial and in the previous one), put_file() simply copies the file to the given directory on the same system.
The first argument of put_file() is the path to the file on the system where the test resides ("files/rosa.odt"). If the path is relative, it is considered relative to the directory where the source file of the test (test_files.py) is located. The path to that directory is available in self.srcdir from within the test.
The second argument is the path on the system under test where the file should be copied. If the path is relative, it is considered relative to the directory for the temporary files of the test. This directory is created automatically for each test and the path to it is available to the test as self.tmpdir. Again, note that the path is on the system under test, not necessarily on the system where the test itself is located.
put_file() returns the absolute path to the file on the system under test.
Note that when the test is run locally, the copied file will be owned by the current user, but when the test operates on a different machine, the file will be owned by root. Not critical for this tutorial, but if the test needed to change that file, the rights to write to that file would have been set:
self.run_command(["chmod", "a+w", path])
To open the file, open_file() method can be used (its implementation is below). When the file has been opened, the test should check that Writer displays its contents correctly (![]() , images/writer-text-rosa.png). Then the test may close Writer and give it some time to finish.
, images/writer-text-rosa.png). Then the test may close Writer and give it some time to finish.
        self.open_file(path)

        self.wait("writer-text-rosa")

        # Ask Writer to close and give it some time to do it correctly
        self.press_key("alt-f4")
        time.sleep(5)
Let us implement open_file() method in the test case class. To open the file, the test will press "ctrl-o" first:
    def open_file(self, path):
        """Opens the specified file.

        Helper function. Assumes load_images() has been called already.
        """
        self.press_key("ctrl-o")
Now the test should check that the dialog for opening the file has appeared. It is possible, for example, to look for "Open" button on the screen. The position of the button will also be needed later: it will be pressed when the function specifies the file in the dialog. Also note that the button may be selected (![]() , images/writer-open-selected.png) or not selected (
, images/writer-open-selected.png) or not selected (![]() , images/writer-open.png) by default. Both cases should be handled.
, images/writer-open.png) by default. Both cases should be handled.
        # "Open" button may be selected or not, handle both cases.
        button = self.find("writer-open-selected", timeout=3)
        if not button:
            button = self.find("writer-open", timeout=3)

        self.assertIsNotNone(button)
Note. As is was mentioned above, the tests may use any methods of unittest.TestCase, including the assertion methods that check the given condition and raise an exception if it is not true. self.assertIsNotNone(button) is a call exactly of this kind.
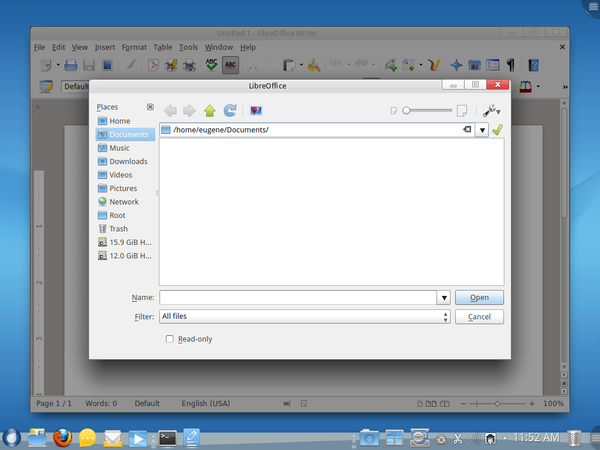
At this point, the test should select rosa.odt file in the dialog. To do this, one could enter the path to the directory containing the file (os.path.dirname(path)) and the name of the file (os.path.basename(path)) in the appropriate fields of the dialog.
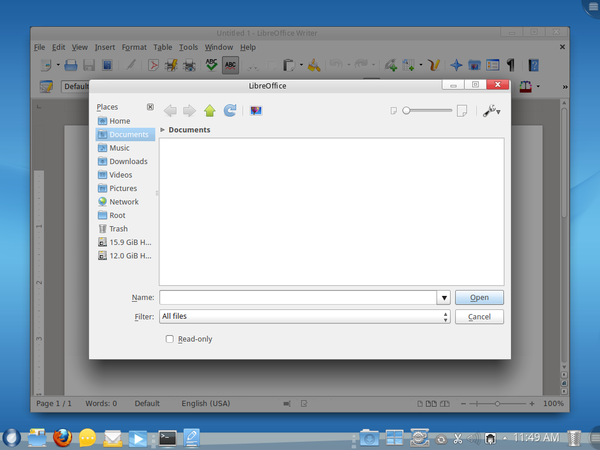
A tricky point is that the line with the path to the directory is not always editable by default. Usually it is in navigation mode:
So, if there is ![]() (images/writer-path-ok.png) on the screen, one may assume the line with the path is in editing mode, otherwise - in navigation mode. If the latter is the case, the test should switch it to editing mode by right-clicking any of the triangles
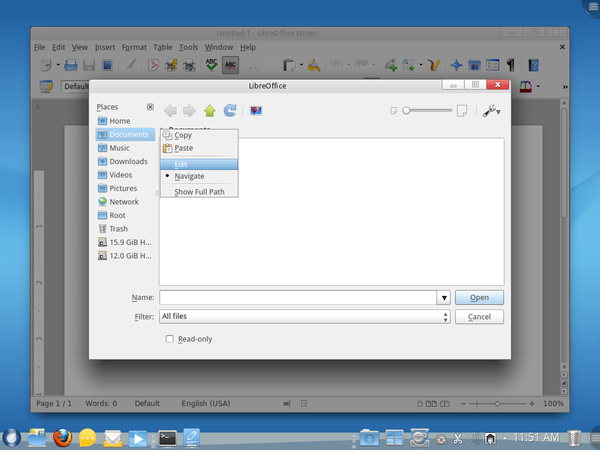
(images/writer-path-ok.png) on the screen, one may assume the line with the path is in editing mode, otherwise - in navigation mode. If the latter is the case, the test should switch it to editing mode by right-clicking any of the triangles ![]() (images/writer-triangle.png) and selecting "Edit" in the context menu.
(images/writer-triangle.png) and selecting "Edit" in the context menu.
Code:
        # Now, the area for the directory path may be in navigation or in
        # editing mode. If the latter is the case, switch to the editing
        # mode.
        if not self.find("writer-path-ok", timeout=0):
            # Assuming we are in navigation mode, switch to editing.
            self.right_click("writer-triangle")
            time.sleep(1) # Give the context menu some time to appear.

            # To the 3rd item in the context menu
            self.press_key("down")
            self.press_key("down")
            self.press_key("down")
            self.press_key("enter")
            time.sleep(0.5)
Erase the current path to the directory by clicking ![]() (images/writer-path-erase.png) and write the path to the needed directory:
(images/writer-path-erase.png) and write the path to the needed directory:
        self.click("writer-path-erase")
        time.sleep(0.5)

        self.type_string(os.path.dirname(path))
        self.press_key("enter")
        time.sleep(0.5)
To find the edit control for the name of the file, recall that "Open" button is directly to the right from it. The position of the button was saved in variable button above. Click, say, 100 pixels to the left and it should hit the needed edit control:
        # Click the edit box for the file name, to the left of "Open".
        self.click(button, dx=-100)
        time.sleep(0.5)
As you can see, click() (as well as right_click(), double_click(), etc.) accept optional arguments dx and dy. This way, an offset in pixels from the center of the image can be specified.
Note. X axis is from left to right, Y axis - from top to bottom, (0, 0) - is the top-left corner of the screen.
Let us erase the old file name in the field if it is there, enter the new one and click "Open":
        # Erase the old file name (if any)
        self.press_key("ctrl-a")
        self.press_key("del")
        self.type_string(os.path.basename(path))

        self.click(button)
That is it.
Here is the complete test prepared in this tutorial::
import time
import os.path
import rosatest

class TestFiles(rosatest.TestCaseInstalled):

    @rosatest.imagebased
    def test_files(self):
        """A test to show file operations"""
        self.load_images("images")

        self.press_key("alt-f2")
        time.sleep(1) # wait a little for the edit control to show up

        # Start LibreOffice Writer
        self.type_string("writer\n")
        self.wait("writer-panel", timeout=60, interval=5)

        width, height = self.screen_size()

        # Make sure the main window has focus
        self.click(width/2, height/2)

        # Use put_file() to copy the file to the system under test
        path = self.put_file("files/rosa.odt", "rosa.odt")
        self.open_file(path)

        self.wait("writer-text-rosa")

        # Ask Writer to close and give it some time to do it correctly
        self.press_key("alt-f4")
        time.sleep(5)

    def open_file(self, path):
        """Opens the specified file in LibreOffice Writer.

        Helper function. Assumes load_images() has been called already.
        """
        self.press_key("ctrl-o")

        # "Open" button may be selected or not, handle both cases.
        button = self.find("writer-open-selected", timeout=3)
        if not button:
            button = self.find("writer-open", timeout=3)

        self.assertIsNotNone(button)

        # Now, the area for the directory path may be in navigation or in
        # editing mode. If the latter is the case, switch to the editing
        # mode.
        if not self.find("writer-path-ok", timeout=0):
            # Assuming we are in navigation mode, switch to editing.
            self.right_click("writer-triangle")
            time.sleep(1)

            # To the 3rd item in the context menu
            self.press_key("down")
            self.press_key("down")
            self.press_key("down")
            self.press_key("enter")
            time.sleep(0.5)

        self.click("writer-path-erase")
        time.sleep(0.5)

        self.type_string(os.path.dirname(path))
        self.press_key("enter")
        time.sleep(0.5)

        # Click the edit box for the file name, to the left of "Open".
        self.click(button, dx=-100)
        time.sleep(0.5)

        # Erase the old file name (if any)
        self.press_key("ctrl-a")
        self.press_key("del")
        self.type_string(os.path.basename(path))

        self.click(button)
API for the Tests
Description of the API for the tests is available in test.py file in the comments to the relevant methods of TestCase class.
The methods of unittest.TestCase class can also be used.
Besides that, the tests may use the following fields:
- self.srcdir - absolute path to the directory containing the source file of the test;
- self.tmpdir - absolute path to the directory for the temporary files of the test (on the system under test).

