Difference between revisions of "What is SimpleWelcome"
(→Working with SimpleWelcome) |
(→Working with SimpleWelcome) |
||
| (4 intermediate revisions by the same user not shown) | |||
| Line 58: | Line 58: | ||
<u>To open a recently closed document</u>, find it in the "Welcome" --> "Recent Documents" section, place mouse cursor over the icon of necessary file (it should become highlighted with blue), and click on it.<br /> | <u>To open a recently closed document</u>, find it in the "Welcome" --> "Recent Documents" section, place mouse cursor over the icon of necessary file (it should become highlighted with blue), and click on it.<br /> | ||
This looks like the following:<br /> | This looks like the following:<br /> | ||
| − | [[File:Primer3.png]]<br /> | + | [[File:Primer3-en.png]]<br /> |
<u>If you want to launch an application</u> which is not shown in the "Welcome" -> "Recent Applications" section and you know its name or how its icon looks like, you should go to the "Applications" section, find necessary icon, place mouse cursor over it (the icon should become highlighted with blue), and click on it.<br /> | <u>If you want to launch an application</u> which is not shown in the "Welcome" -> "Recent Applications" section and you know its name or how its icon looks like, you should go to the "Applications" section, find necessary icon, place mouse cursor over it (the icon should become highlighted with blue), and click on it.<br /> | ||
For example, let's launch Control Center:<br /> | For example, let's launch Control Center:<br /> | ||
| − | [[File:Primer4.png]]<br /> | + | [[File:Primer4-en.png]]<br /> |
<u>Now let us suppose that you are going to burn a DVD with your data</u> but don't know which program to use for this or can't find familiar applications in the "Applications" section. In this case, you can use the search feature in the "Applications" section. At the top of its window you can find the search field. In our example, let's type 'burn' there and press Enter. This will give us a list of application whose name or description contains the string we are looking for. In our case there will be only one application found - K3b.<br /> | <u>Now let us suppose that you are going to burn a DVD with your data</u> but don't know which program to use for this or can't find familiar applications in the "Applications" section. In this case, you can use the search feature in the "Applications" section. At the top of its window you can find the search field. In our example, let's type 'burn' there and press Enter. This will give us a list of application whose name or description contains the string we are looking for. In our case there will be only one application found - K3b.<br /> | ||
| − | [[File:Primer5.png|500px|thumb|center]]<br /> | + | [[File:Primer5-en.png|500px|thumb|center]]<br /> |
<u>In order to quickly switch between sections</u>, you can use mouse scroll wheel while holding mouse cursor over the name of any section<br /> | <u>In order to quickly switch between sections</u>, you can use mouse scroll wheel while holding mouse cursor over the name of any section<br /> | ||
| Line 73: | Line 73: | ||
<u>In order to place application quick-launch icon to the taskbar, you need:</u><br /> | <u>In order to place application quick-launch icon to the taskbar, you need:</u><br /> | ||
a) Find necessary application icon in SimpleWelcome and drag it using mouse (holding the left mouse key) to the desired place at the taskbar. The target place where the icon will be added will be highlighted with white background.<br /> | a) Find necessary application icon in SimpleWelcome and drag it using mouse (holding the left mouse key) to the desired place at the taskbar. The target place where the icon will be added will be highlighted with white background.<br /> | ||
| − | [[File:Primer6.png]]<br /> | + | [[File:Primer6-en.png]]<br /> |
b) As soon as you are satisfied with the location where the icon will be added, release the left mouse button. Application icon will be added to the taskbar.<br /> | b) As soon as you are satisfied with the location where the icon will be added, release the left mouse button. Application icon will be added to the taskbar.<br /> | ||
| − | [[File:Primer7.png]]<br /> | + | [[File:Primer7-en.png]]<br /> |
<u>To move e.g. the "Home" icon to the taskbar, you need:</u><br /> | <u>To move e.g. the "Home" icon to the taskbar, you need:</u><br /> | ||
a) In the "Welcome" section of SimpleWelcome, find the "Home" ison and drag it using mouse (holding the left mouse key) to the desired place at the taskbar. The target place where the icon will be added will be highlighted with white background.<br /> | a) In the "Welcome" section of SimpleWelcome, find the "Home" ison and drag it using mouse (holding the left mouse key) to the desired place at the taskbar. The target place where the icon will be added will be highlighted with white background.<br /> | ||
| − | [[File:Primer8.png]]<br /> | + | [[File:Primer8-en.png]]<br /> |
b) As soon as you are satisfied with the location where the icon will be added, release the left mouse button. In the appeared "Plasmoids" form, choose "View folder"<br /> | b) As soon as you are satisfied with the location where the icon will be added, release the left mouse button. In the appeared "Plasmoids" form, choose "View folder"<br /> | ||
| − | [[File:Primer9.png]]<br /> | + | [[File:Primer9-en.png]]<br /> |
c) Your "Home folder" icon will appear on the taskbar.<br /> | c) Your "Home folder" icon will appear on the taskbar.<br /> | ||
| − | [[File:Primer10.png]]<br /> | + | [[File:Primer10-en.png]]<br /> |
<u>In order to add the "Home folder" icon to the taskbar as a '''Stack Folder''', you should:</u><br /> | <u>In order to add the "Home folder" icon to the taskbar as a '''Stack Folder''', you should:</u><br /> | ||
a) In the "Welcome" subsection of SimpleWelcome, find the "Home" icon and drag it using mouse (holding the left mouse key) to the desired place at the taskbar. The target place where the icon will be added will be highlighted with white background.<br /> | a) In the "Welcome" subsection of SimpleWelcome, find the "Home" icon and drag it using mouse (holding the left mouse key) to the desired place at the taskbar. The target place where the icon will be added will be highlighted with white background.<br /> | ||
| − | [[File:Primer8.png]]<br /> | + | [[File:Primer8-en.png]]<br /> |
b) As soon as you are satisfied with the location where the icon will be added, release the left mouse button. In the appeared "Plasmoids" form, choose "Stack folder"<br /> | b) As soon as you are satisfied with the location where the icon will be added, release the left mouse button. In the appeared "Plasmoids" form, choose "Stack folder"<br /> | ||
| − | [[File:Primer11.png]]<br /> | + | [[File:Primer11-en.png]]<br /> |
c) You "Home folder" icon will appear on the taskbar.<br /> | c) You "Home folder" icon will appear on the taskbar.<br /> | ||
| − | [[File:Primer12.png|500px|thumb|center]]<br /> | + | [[File:Primer12-en.png|500px|thumb|center]]<br /> |
---- | ---- | ||
Latest revision as of 14:51, 1 June 2012
SimpleWelcome is an application launcher used by default in ROSA operating system. It appears when you click on the button in the left corner of your desktop taskbar.
Launch icon:
![]()
Besides possibility to launch applications, SimpleWelcome provides you with access to frequently used applications, places and recently accessed documents. SimpleWelcome also provides you with access to the brand-name TimeFrame system to view your documents and media files in your Home folder.
Contents
SimpleWelcome main window
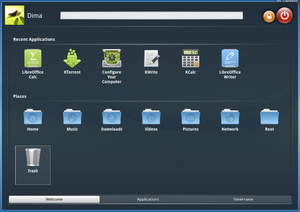
In the upper-left corner name and icon of the current user are displayed. In the middle you can see a search bar. In the upper-right corner you can see two buttons - Lock screen and Reboot/Shutdown. There is a scroll bar at the right side of the window. At the bottom of SimpleWelcome you can find tabs corresponding to its subsections.
SimpleWelcome structure
SimpleWelcome consists of the following three sections:
1. "Welcome"
2. "Applications"
3. "TimeFrame"
"Welcome" section
This section is divided to the following subcategories:
1. "Applications"
2. "Places"
3. "Recent Documents"
The "Recent Applications" subsection displays recently launched applications.
The "Places" subsection displays frequently accessed folders and other locations.
The "Recent Documents" subsection displays recently accessed documents, media files, archives, etc.
"Applications" section
This section is divided to subsections according to categories of applications installed in your system. The following five categories are used by default:
1."Internet"
2."Office"
3."Graphics"
4."Sound and Video"
5."Tools"
Working with SimpleWelcome
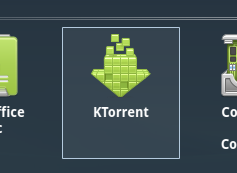
To launched a recently closed application, you should just go to the "Welcome" -> "Recent Applications" section, place mouse cursor over the application icon (it should become highlighted with blue), and click on it.
This looks like the following:
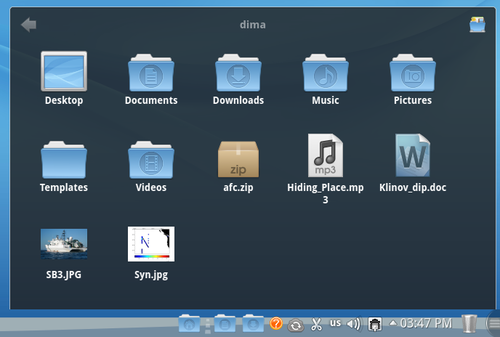
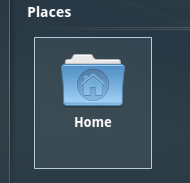
To launch Dolphin from the Home folder, you can go to the "Welcome" --> "Places" section , place mouse cursor over the "Home" icon (it should become highlighted with blue), and click on it.
This will look like the following:
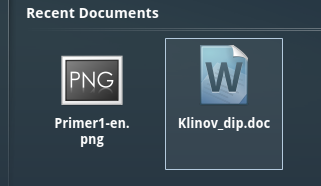
To open a recently closed document, find it in the "Welcome" --> "Recent Documents" section, place mouse cursor over the icon of necessary file (it should become highlighted with blue), and click on it.
This looks like the following:
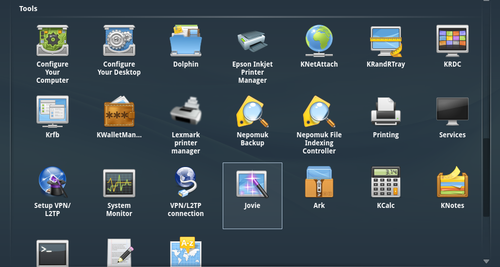
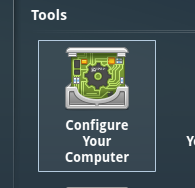
If you want to launch an application which is not shown in the "Welcome" -> "Recent Applications" section and you know its name or how its icon looks like, you should go to the "Applications" section, find necessary icon, place mouse cursor over it (the icon should become highlighted with blue), and click on it.
For example, let's launch Control Center:
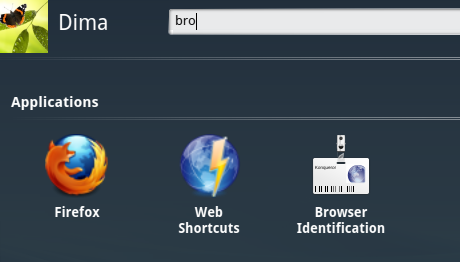
Now let us suppose that you are going to burn a DVD with your data but don't know which program to use for this or can't find familiar applications in the "Applications" section. In this case, you can use the search feature in the "Applications" section. At the top of its window you can find the search field. In our example, let's type 'burn' there and press Enter. This will give us a list of application whose name or description contains the string we are looking for. In our case there will be only one application found - K3b.
In order to quickly switch between sections, you can use mouse scroll wheel while holding mouse cursor over the name of any section
In order to quickly switch between subsections, you can either use mouse scroll wheel or keyboard arrow keys.
In order to place application quick-launch icon to the taskbar, you need:
a) Find necessary application icon in SimpleWelcome and drag it using mouse (holding the left mouse key) to the desired place at the taskbar. The target place where the icon will be added will be highlighted with white background.

b) As soon as you are satisfied with the location where the icon will be added, release the left mouse button. Application icon will be added to the taskbar.

To move e.g. the "Home" icon to the taskbar, you need:
a) In the "Welcome" section of SimpleWelcome, find the "Home" ison and drag it using mouse (holding the left mouse key) to the desired place at the taskbar. The target place where the icon will be added will be highlighted with white background.

b) As soon as you are satisfied with the location where the icon will be added, release the left mouse button. In the appeared "Plasmoids" form, choose "View folder"
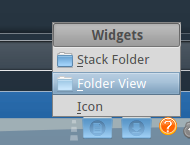
c) Your "Home folder" icon will appear on the taskbar.
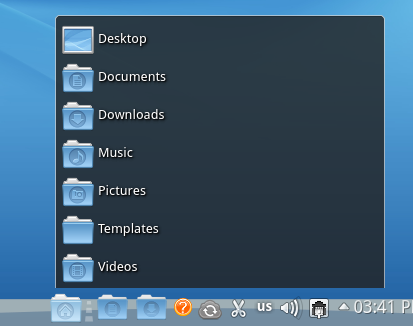
In order to add the "Home folder" icon to the taskbar as a Stack Folder, you should:
a) In the "Welcome" subsection of SimpleWelcome, find the "Home" icon and drag it using mouse (holding the left mouse key) to the desired place at the taskbar. The target place where the icon will be added will be highlighted with white background.

b) As soon as you are satisfied with the location where the icon will be added, release the left mouse button. In the appeared "Plasmoids" form, choose "Stack folder"
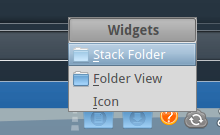
c) You "Home folder" icon will appear on the taskbar.
